


How to do a blower door test
A step-by-step outline of how to carry out a blower door test to determine the airtightness of a building
Overview
A blower door test is a critical procedure for assessing the airtightness of buildings. By employing a powerful fan to create pressure differences, this test measures air infiltration and identifies areas where a building may be losing conditioned air or letting in unconditioned air. Understanding blower door testing, including its principles and execution, is essential for improving energy efficiency and indoor air quality in buildings.
Why it's used
Blower door tests are crucial for evaluating a building's airtightness and identifying potential energy inefficiencies. By pinpointing areas of air leakage, such as gaps around doors and windows or poorly sealed ductwork, these tests help in implementing targeted retrofit measures to enhance energy efficiency and comfort. They also contribute to better indoor air quality by reducing the infiltration of outdoor pollutants and allergens.
When to do a blower door test
Blower door tests are conducted at various stages of a building's lifecycle. They are essential during new construction to ensure compliance with building codes and verify the effectiveness of air sealing measures. In existing buildings, these tests help diagnose energy efficiency issues and prioritize retrofit efforts. Moreover, conducting blower door tests before and after implementing retrofit measures allows for the assessment of improvement effectiveness.
Preparatory Stage:
- Equipment Gathering: Assemble necessary equipment, including the blower door system, duct tape, and sealing materials.
- Building Inspection: Identify potential openings in the building envelope that need sealing.
- Building Preparation: Close all doors, windows, vents, and other openings to ensure an airtight testing environment.
Setup Stage:
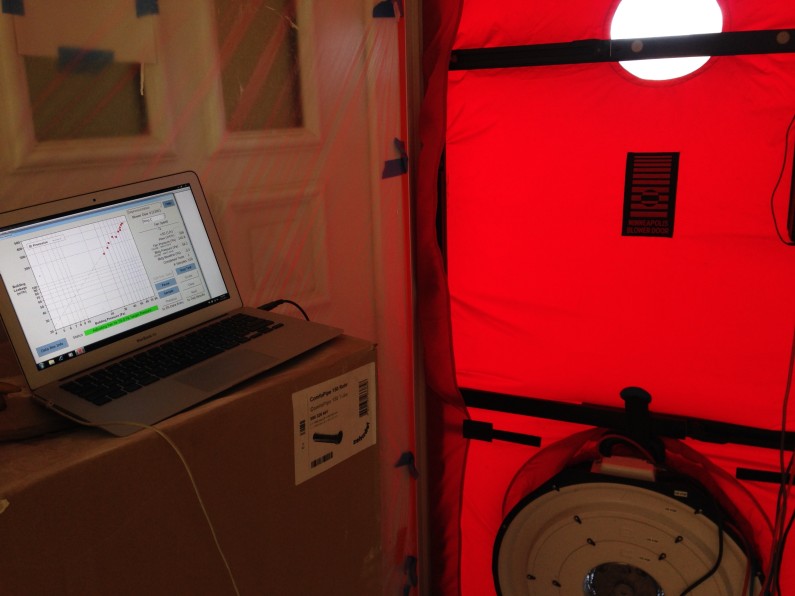
- Blower Door Installation: Securely mount the blower door frame in an exterior doorway.
- Equipment Calibration: Calibrate the pressure gauge and fan according to manufacturer instructions.
- Baseline Establishment: Measure the initial air pressure inside the building.
Testing Stage:
- Pressurization Test: Use the blower door fan to pressurize the building gradually, creating a pressure difference.
- Airflow Measurement: Record the airflow rate required to maintain the desired pressure difference.
- Leak Inspection: Utilize smoke pencils or thermal imaging cameras to identify areas of air leakage.
- Analysis Stage:
- Air Leakage Calculation: Determine the air leakage rate, typically measured in cubic feet per minute (CFM).
- Results Assessment: Compare the measured air leakage rate against industry standards to evaluate the building's airtightness.
- Problem Area Identification: Prioritize sealing efforts based on identified leakage areas.
Reporting Stage:
- Documentation: Prepare a detailed report outlining the test procedure, results, and recommended sealing measures.
- Communication: Discuss findings and recommendations with stakeholders to facilitate informed decision-making regarding energy efficiency improvements.